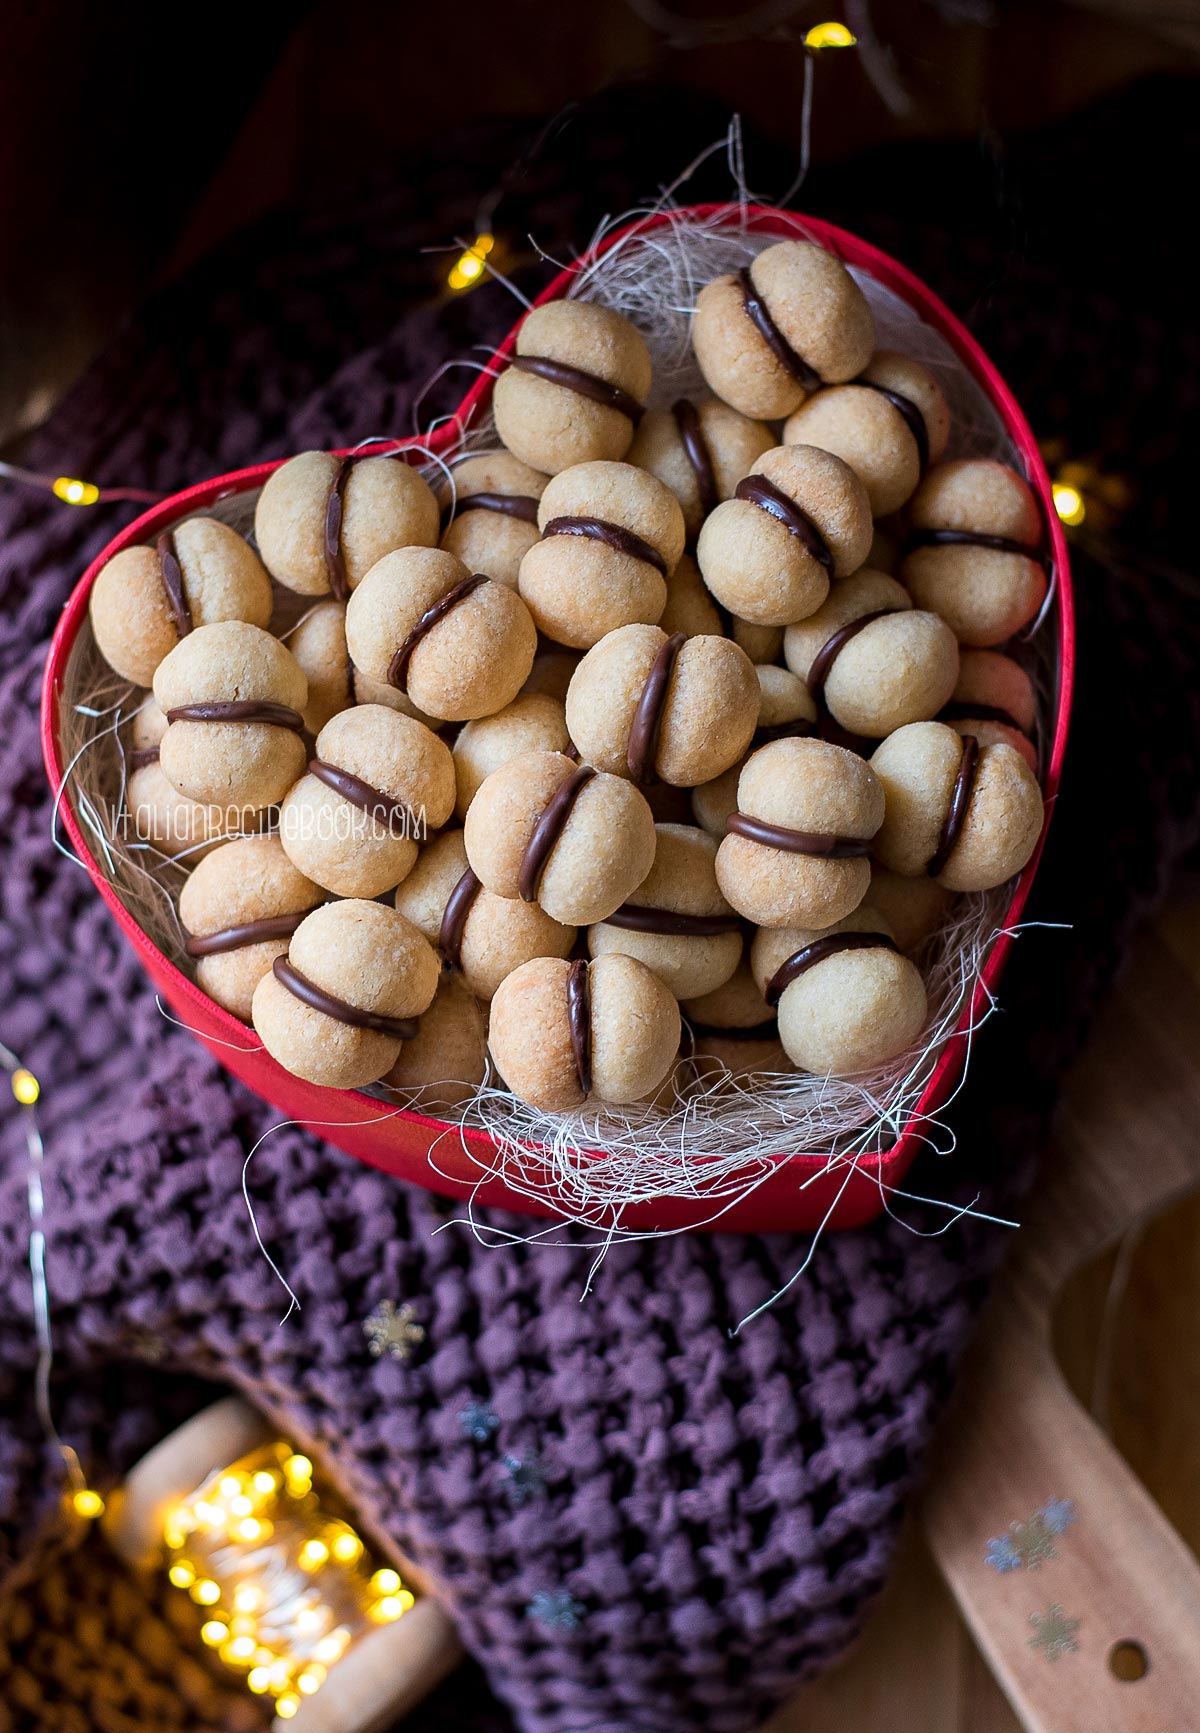
Baci di Dama, translate as Lady’s Kisses, are classic Italian shortbread nut cookies sandwiched together with a layer of dark chocolate.
These sweet treats are named after their resemblance to two lips kissing. Not even Cupid could come up with a more romantic cookie, right?!

Their small size is perfect for satisfying a sweet tooth without overindulging - as long as you can stop!
Baci Di Dama cookies are usually served with coffee or tea and can be found in many bakeries. They can also be enjoyed as part of a larger Italian-style dessert platter alongside other traditional Italian cookies such as cantucci, canestrelli, and bruttiboni.
Baci di Dama are also great to give as a homemade gift. They can be stored in a tin box and last for about a week.

How To Pronounce Baci di Dama
To pronounce Baci di Dama, begin by saying the word baci as 'bah-chee', emphasizing the 'ch' sound. The "c" is pronounced like the English "ch" sound.
Next, say the words di dama as 'dee dah-mah', emphasizing the 'dah' sound.
Put everything together and you have: 'bah-chee dee dah-mah’!
Baci Di Dama Variations
Baci di Dama cookies can be made with hazelnut flour (hazelnut meal), almond flour or a mix of both.
I find the taste of cookies made with hazelnut flour are a little too overpowering, but that’s matter of taste. Try different variantions and see which one you like the best.
Ingredients To Make Baci Di Dama Cookies
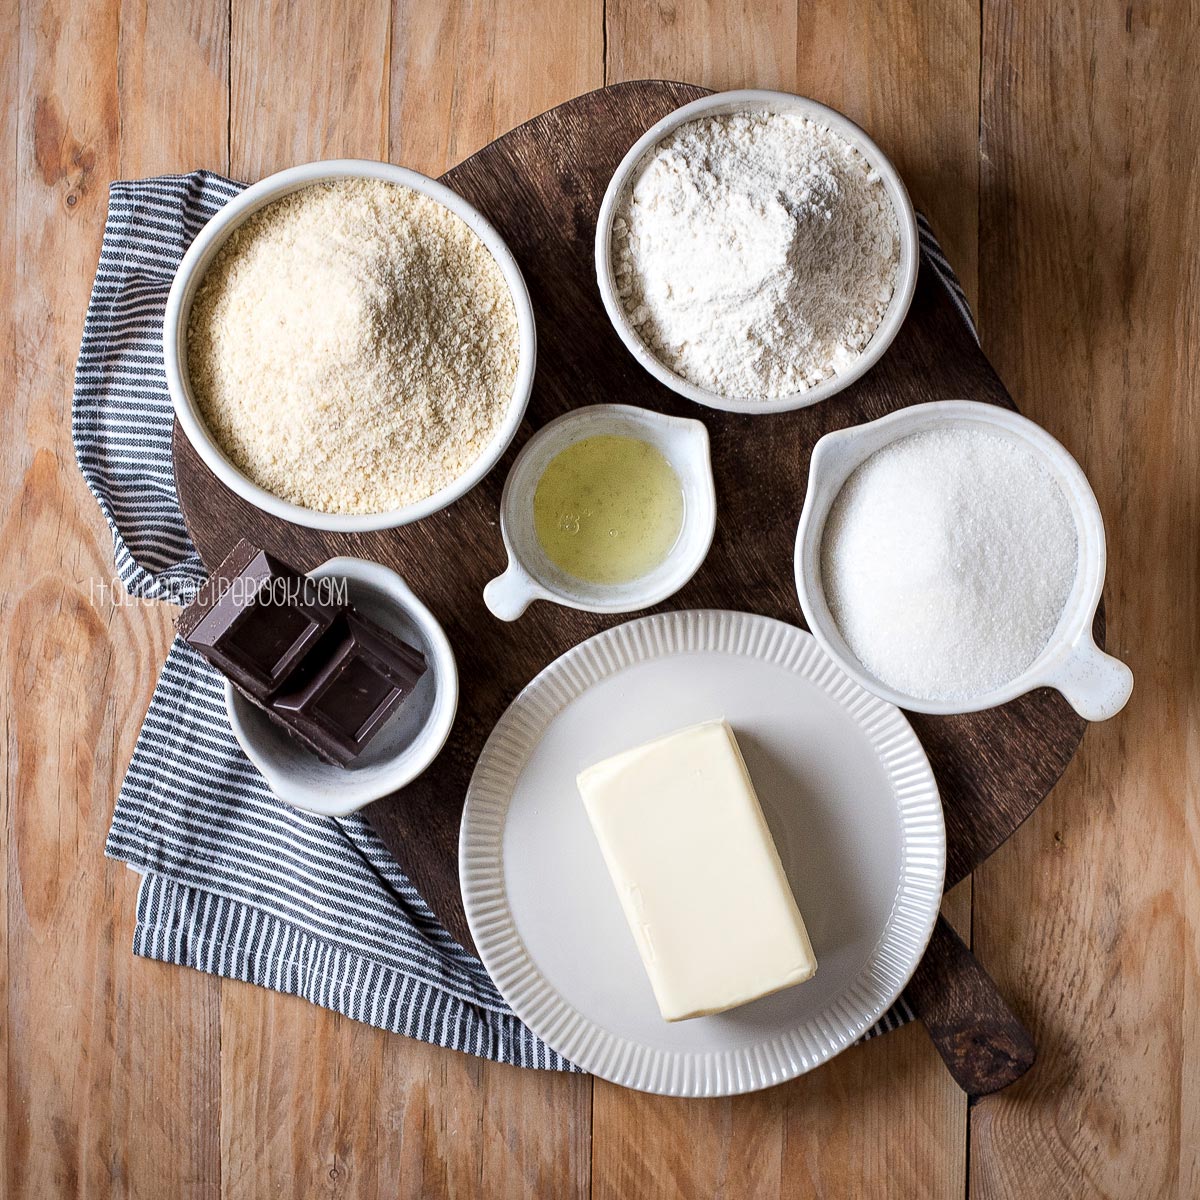
- Almond or Hazelnut flour - you can use store bought flour or make it yourself.
- All purpose flour - can be substituted with pastry flour for more crunchy texture.
- Butter - unsalted butter, cold from the fridge.
- Sugar - granulated sugar works great, there’s no need for caster sugar.
- Egg white - helps hold the dough together so as ads extra bite to the cookies. If allergic, it can be replaces with the same amount of ice water.
- Dark chocolate - use quality dark chocolate since it’s the heart of the Lady Kisses cookies.
How To Make Baci Di Dama - Step By Step
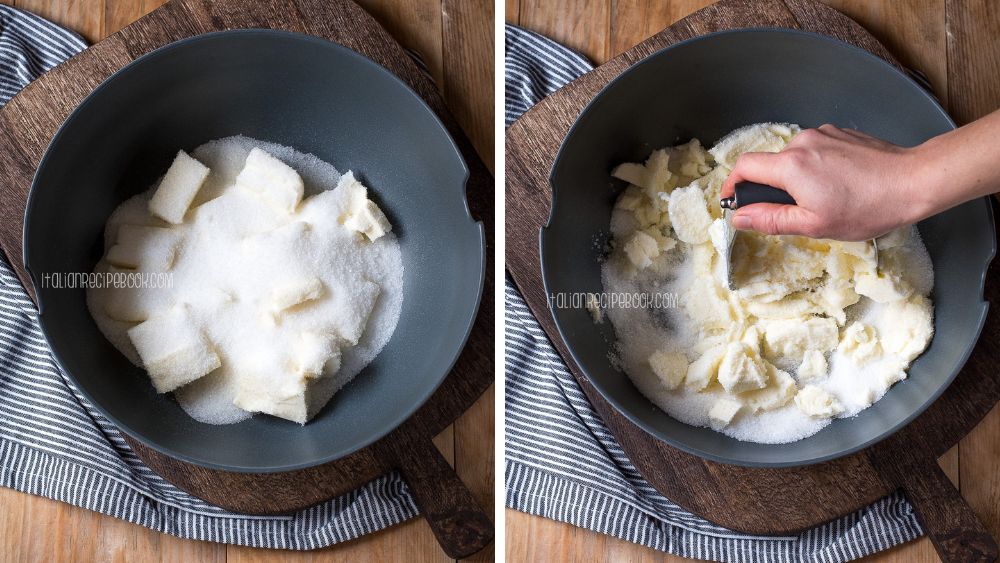
Start by blending together cold butter, sugar and a pinch of salt. I use the dough blender but you can do everything in a food processor following the same steps.
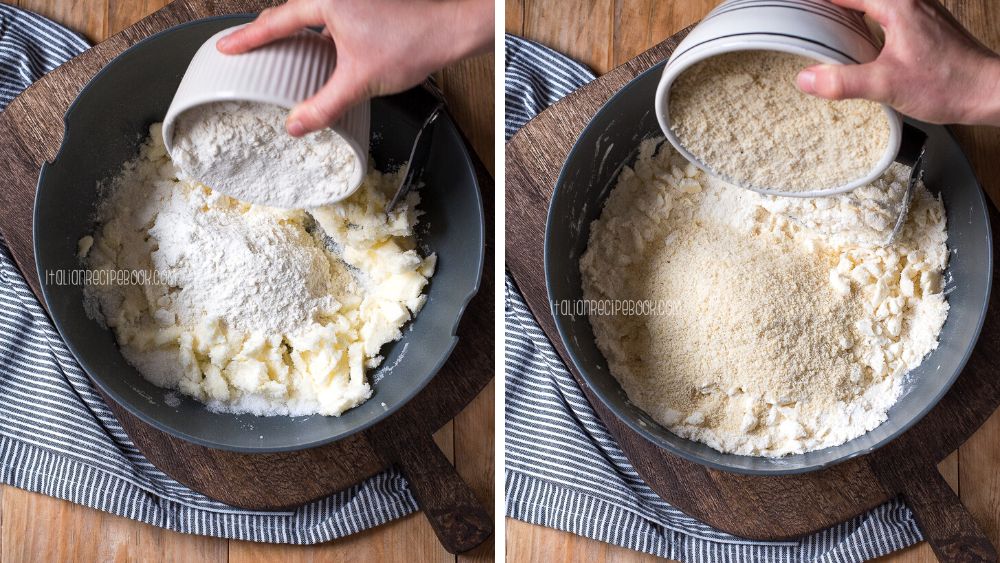
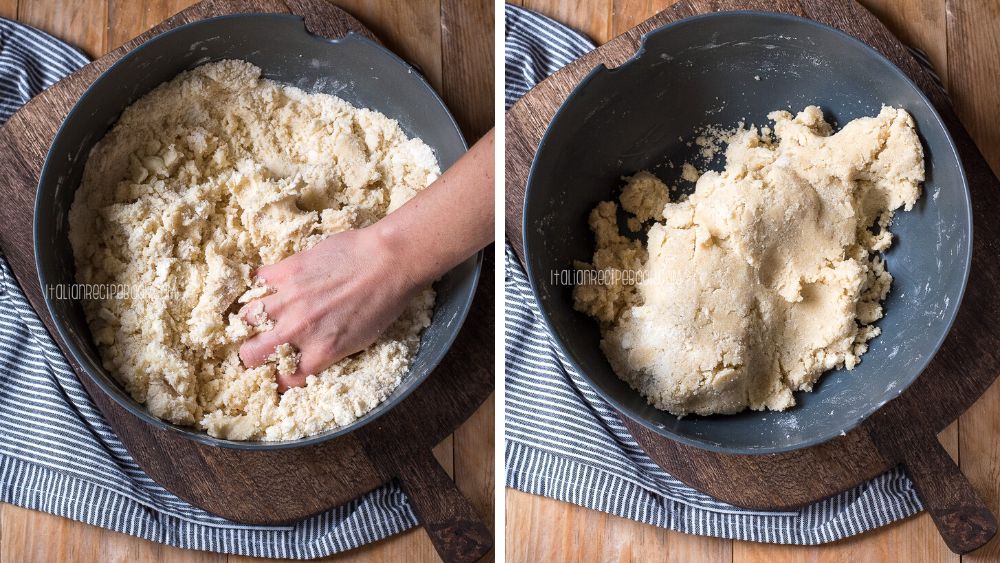
Add all purpose flour and nut flour, mix again until you have a crumbly dough.
Add egg white. Knead until the dough comes together.
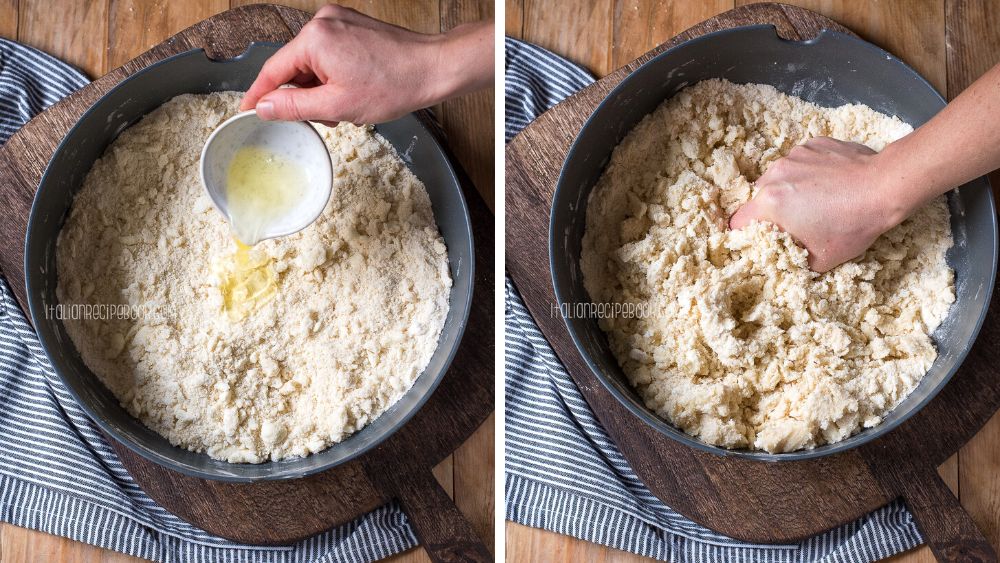
There should be no dry flour left. If needed add a teaspoon of cold water to form the dough.
Form a rectangular rolling the dough between the parchment paper.
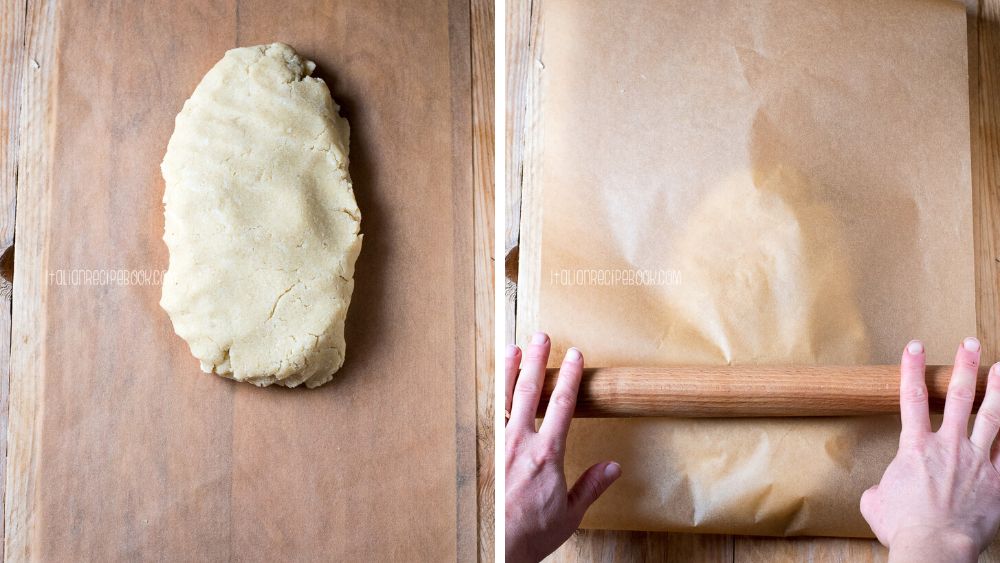
If needed use rolling pin to even the edges.

Cover the dough with parchment paper and seal the sides to prevent the dough from drying. You can additional wrap in a plastic wrap. I also suggest to put it on a board or on a tray.
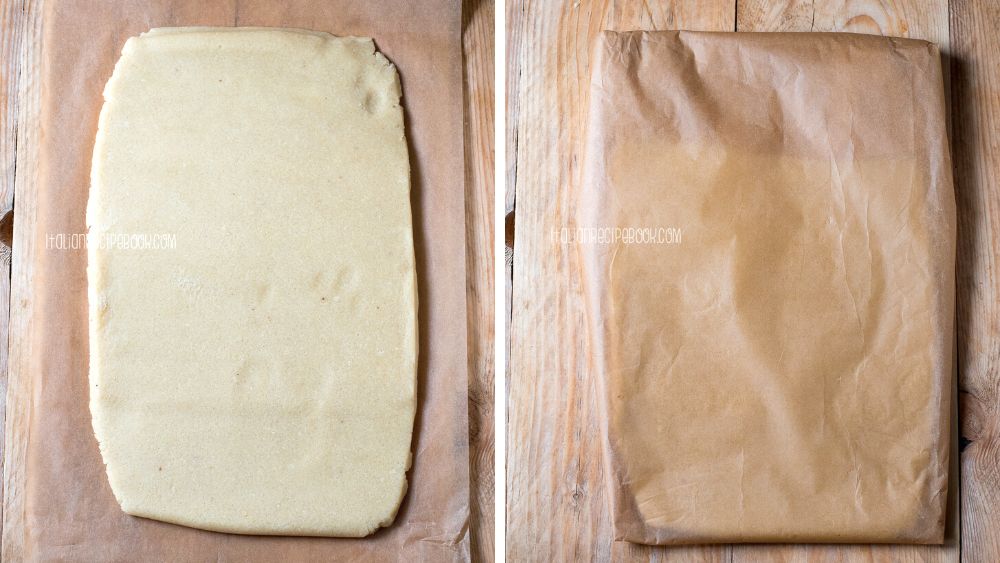
Let rest in the fridge for 3 hours or overnight.
Once the dough is chilled, cut it into small squares.
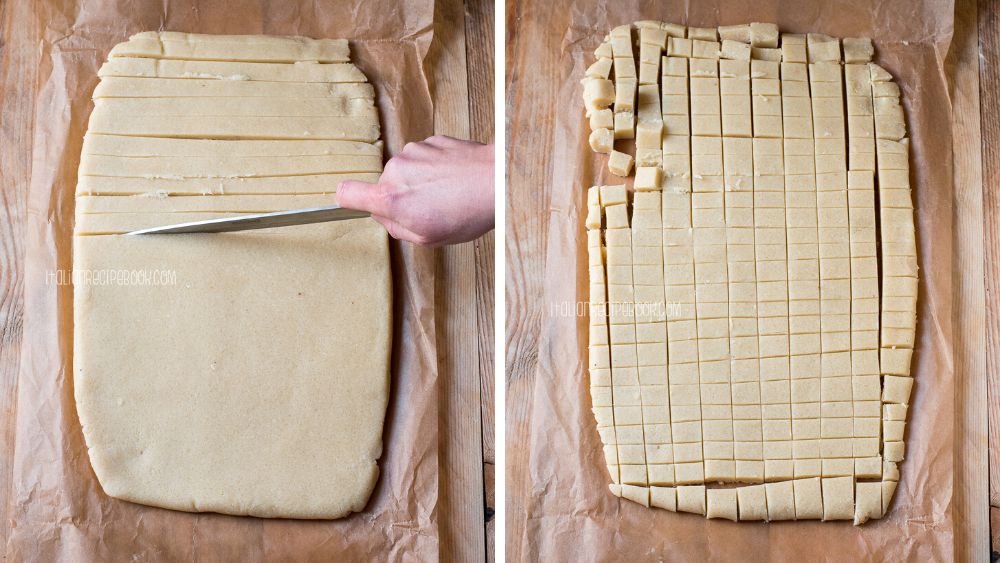
Take a square piece and roll it into a ball between the palms of your hand. Pinch off or add a little bit more dough to adjust the size of each dough ball.
EXTRA TIP: Work the dough squares in batches. Keep the rest in the fridge to keep the cold and easy to manage and roll.
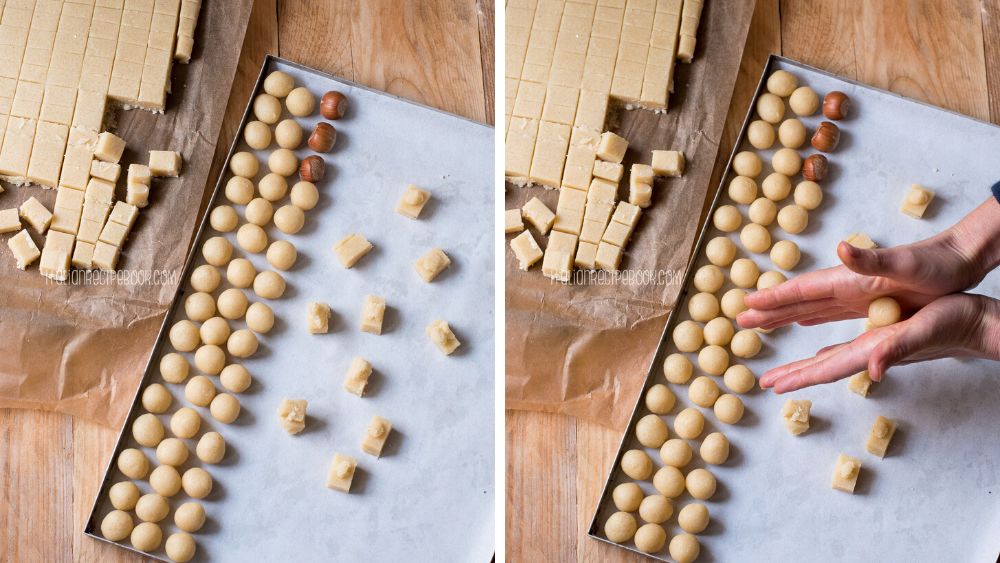
Aim for the size of a hazelnut in a shell or about 5 grams. This will make bite size cookies. You can form slightly bigger balls (up to 8 grams or ⅓ of an ounce) for larger cookies.
It’ll also take a little less time to roll them all. Whatever size you decide to go with, try to make balls more or less of the same size to guarantee even cooking and eventually “kissing” together in a sandwich.
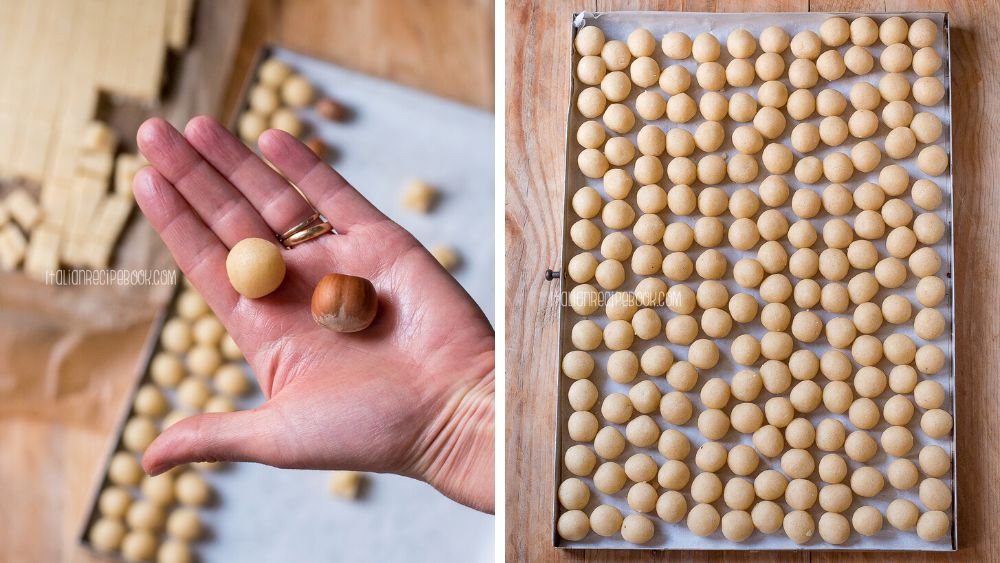
EXTRA TIP: If the ball is crumbling as you roll it simply pinch it together to compact and then roll again.
Place all rolled balls on a baking sheet or on a tray. Cover with a plastic wrap and let rest in the fridge for another 3 hours or better yet overnight.
When ready to bake, preheat oven to 320F (160C). Place on static setting (fan off).
Once the dough balls are chilled transfer them on a baking sheet lined with parchment paper slightly distanced apart.
Bake in a preheated to 320F (160C) oven for 17-20 minutes depending on the size of the cookies.
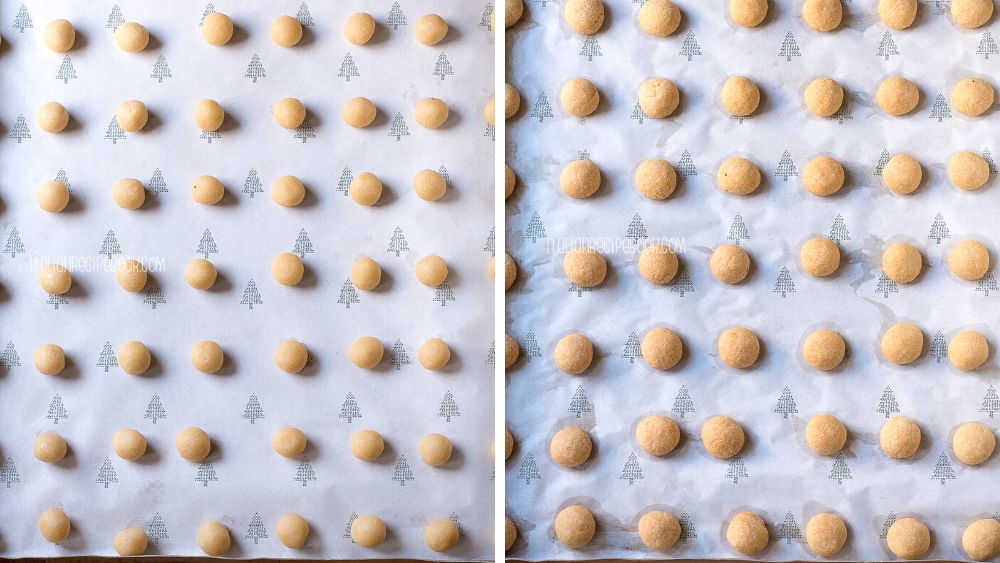
While the first sheet of cookies is in the oven, arrange the rest of the cookies on baking sheets and keep them in the fridge while the first batch is baking.
Once cookies are out of the oven, leave them on the baking sheet to cool without touching. If you touch cookies while they’re still hot they’ll break apart.
Once all cookies are cool, melt dark chocolate.
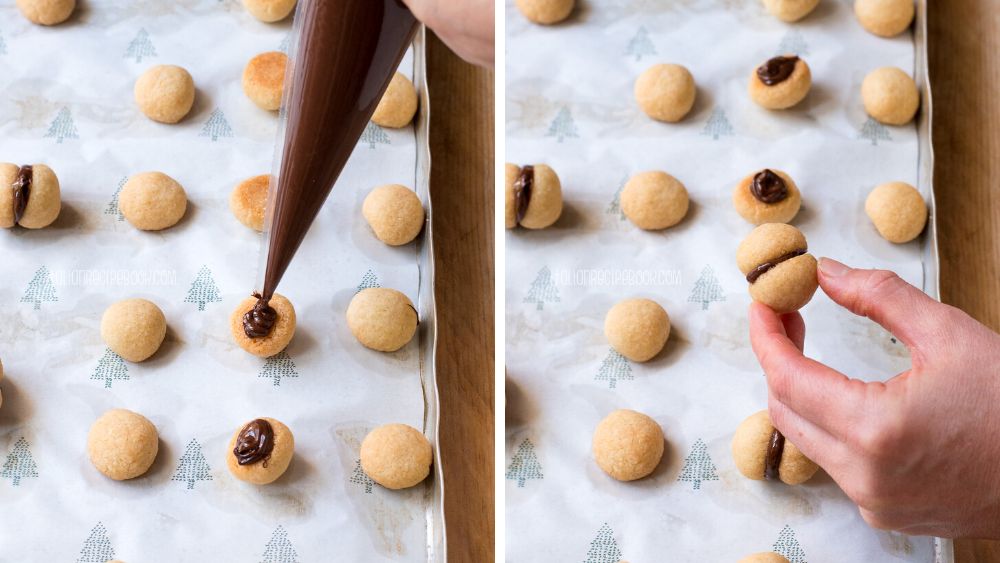
You can use a teaspoon to pour chocolate on the flat side of the cookie or use a pastry bag which is less messy and easier to do.
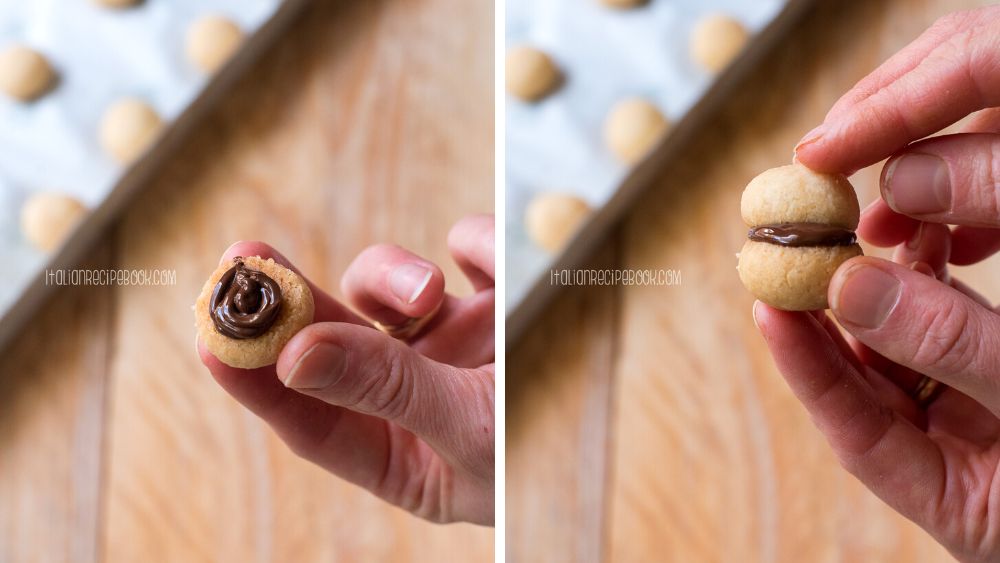
Sandwich chocolate covered parts with plain ones trying to find 2 of the same size to “kiss”.
Let Baci di Dama rest until chocolate solidifies.
EXTRA TIP: Cover with chocolate 10-15 pieces at a time then work the next batch.
Romantic Origin of Baci di Dama Cookies
As with all good stories, Baci di Dama's origins are a bit mysterious. The romantic version is that in 1852, King Vittorio Emanuele II was looking for a new sweet treat for a woman, and the court cooks came up with the idea for the Baci di dama.
The newly created delicacy got the approval of the sovereign and started to appear on royal tables across Italy and Europe.
Baci di Dama come from Tortona, a small town east of Turin. Initially, they were made with hazelnuts since these were cheaper than almonds and Piedmont had plenty.
Then, in 1810, Cavalier Stefano Vercesi introduced the use of almonds and patented a variant known as "golden kisses" which can still be found in the family's pastry shop in Tortona.
Essentially Baci Di Dama recipe includes nut flour, all purpose flour, butter and sugar mixed equal parts, by weight.
In this recipe the sugar amount is slightly reduced, since chocolate provides extra sweetness.
Full Recipe

Baci Di Dama {Lady's Kisses Cookies}
Ingredients
- 2 ½ cups almond flour or hazelnut flour, 250 grams
- 2 scant cups all purpose flour , 250 grams
- 1 cup sugar , 220 grams
- 9 oz unsalted butter , cold, 250 grams
- 2 tablespoon egg white , scant egg white from 1 medium egg, 25 grams
- 5 oz dark chocolate , about 150 grams
- Salt generous pinch
Instructions
- Start by blending together cold butter, sugar and a generous pinch of salt. I use the dough blender but you can do everything in a food processor following the same steps.1 cup sugar, 9 oz unsalted butter, Salt
- Add all purpose flour and nut flour, mix again until you have a crumbly dough.2 ½ cups almond flour, 2 scant cups all purpose flour
- Add egg white. Knead until the dough comes together. There should be no dry flour left. If needed add a teaspoon of cold water to form the dough.2 tablespoon egg white
- Form a rectangular rolling the dough between the parchment paper. If needed use a rolling pin to even the edges.
- Cover the dough with parchment paper and seal the sides to prevent the dough from drying. You can additionally wrap in a plastic wrap. I alLet rest in the fridge for 3 hours or overnight.so suggest to put it on a board or on a tray for easy placement in the fridge.
- Once the dough is chilled, cut it into small squares.Take a square piece and roll it into a ball between the palms of your hand. Pinch off or add a little bit more dough to adjust the size of each dough ball.Aim for the size of a hazelnut in a shell or about 5 grams. This will make bite size cookies. You can form slightly bigger balls (up to 8 grams or ⅓ of an ounce) for larger cookies. It’ll also take a little less time to roll them all. Whatever size you decide to go with, try to make balls more or less of the same size to guarantee even cooking and eventually “kissing” together in a sandwich.EXTRA TIP: If the ball is crumbling as you roll it simply pinch it together to compact and then roll again.
- Place all rolled balls on a baking sheet or on a tray. Cover with a plastic wrap and let rest in the fridge for another 3 hours or better yet overnight.
- When ready to bake, preheat oven to 320F (160C). Place on static setting (fan off).Once the dough balls are chilled transfer them on a baking sheet lined with parchment paper slightly distanced apart.Bake in a preheated to 320F (160C) oven for 17-20 minutes depending on the size of the cookies.While the first sheet of cookies is in the oven, arrange the rest of the cookies on baking sheets and keep them in the fridge while the first batch is baking.
- Once cookies are out of the oven, leave them on the baking sheet to cool without touching. If you touch cookies while they’re still hot they’ll break apart.
- Once all cookies are cool, melt dark chocolate.5 oz dark chocolate
- You can use a teaspoon to pour chocolate on the flat side of the cookie or use a pastry bag which is less messy and easier to do.
- Sandwich chocolate covered parts with plain ones trying to find 2 of the same size to “kiss”.Let baci di dama rest until chocolate solidifies.
Nutrition information is automatically calculated, so should only be used as an approximation.
Today, Baci di Dama can be found in many Italian bakeries, as well as supermarkets and specialty stores.
There are many variations of the famous Piedmontese kiss, but one of the most popular is Baci di Alassio, which involves the addition of cocoa and honey to the dough.
Buon Appetito!





Leave a Reply